As I mentioned in one my of previous posts about RDM6300, I have built an RFID based access control system for the makerspace where I work. To build this project, I chose NodeMCU as micro controller and as a server since we want to monitor our system remotely. For wireless connectivity, I can interface ESP8266 with Arduino. But in the sense of price and easiness it's NodeMCU is better suited for WiFi or Cloud connectivity projects.
What is NodeMCU ?
NodeMCU is a open-source firmware based on ESP8266 WiFi-soc, that helps you to prototype your IOT products. There is a wide variety of development kits available based on NodeMCU firmware. For more information on ESP8266 and interfacing with Arduino, checkout this article ESP8266 INTERFACING WITH ARDUINO UNO.
When we look at features of NodeMCU, it has small form factor and comes with GPIO pins to which you can connect sensors, and input/output devices required for your project. Open-source, Interactive, Programmable, Low cost, Simple, Smart, WI-FI enabled - this is what they described in NodeMCU official website.
It's easy program NodeMCU if you are familiar with Arduino already, but prior experience with Arduino is not mandatory. There are many other ways you can program NodeMCU using Lua, python, JavaScript etc. Here I am going with Arduino IDE for that purpose.
Steps
- Install Arduino IDE
- Configure board manager to recognize NodeMCU
- Write sample program
- Upload program to NodeMCU
So, let me explain each steps in detail.
Install Arduino IDE

Go to Arduino website adn download and install Arduino software that suits your operating system.
Configure board manager to recognize NodeMCU
Open Aarduino IDE. By defualt, Arduino IDE don't comes with a support for NodeMCU. We have to configure Arduino IDE for third party development tools or boards to program using Arduino IDE. In order to do that,
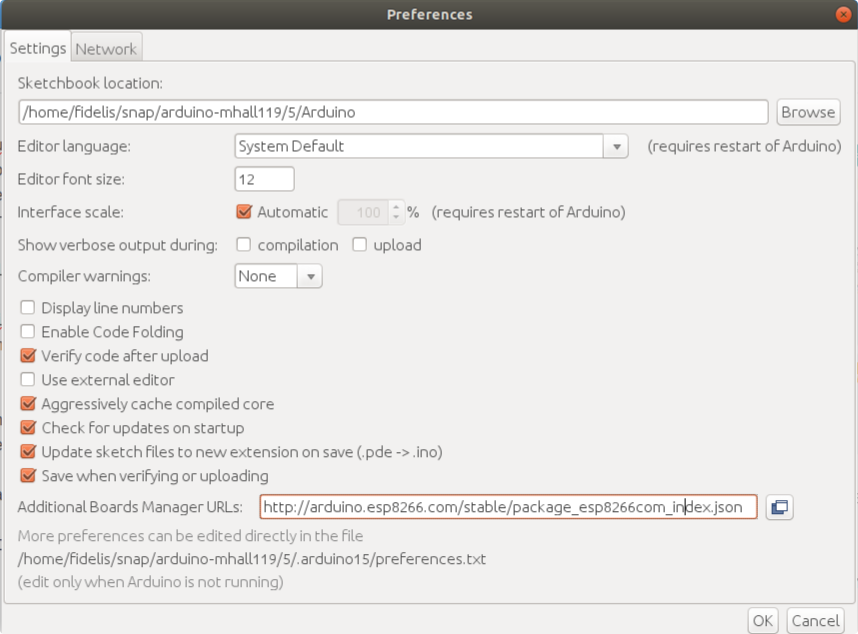
- Select File >> Preferences from the menu. Where you can see a label named Additional board manager URLs: next to a text box. Put
http://arduino.esp8266.com/stable/package_esp8266com_index.jsonin that text text box and click OK button.
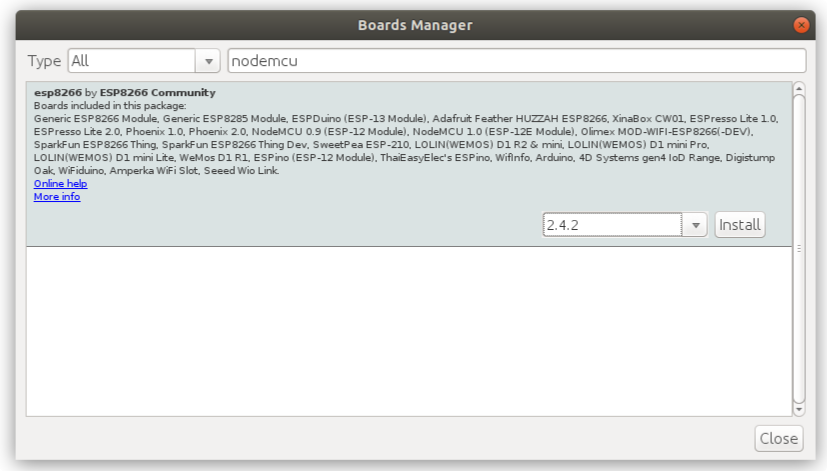
- Select Tools >> Board >> Board Manager from the menu. It will take a little to load the board details. When it's done, search esp8266 or NodeMCU on the search box. Then something shown below will appear. Click on install, this will install necessary files to work with NodeMCU in Arduino IDE. Once the download is complete, close the Board manager window.
To verify ESP8266 or NodeMCU board is configured correctly, go to Tools >> Board >> NodeMCU 1.0 (ESP 12E Module). If necessary files are not downloaded completely, you can't see NodeMCU 1.0 entry in Boards list.
Now connect NodeMCU to your computer using USB cable.
Go to Tools >> Port. Select port of connected NodeMCU.
Write sample program
To make sure your NodeMCU is working prefectly with Arduino IDE, let's try a sample blink program which is already in the Arduino IDE.
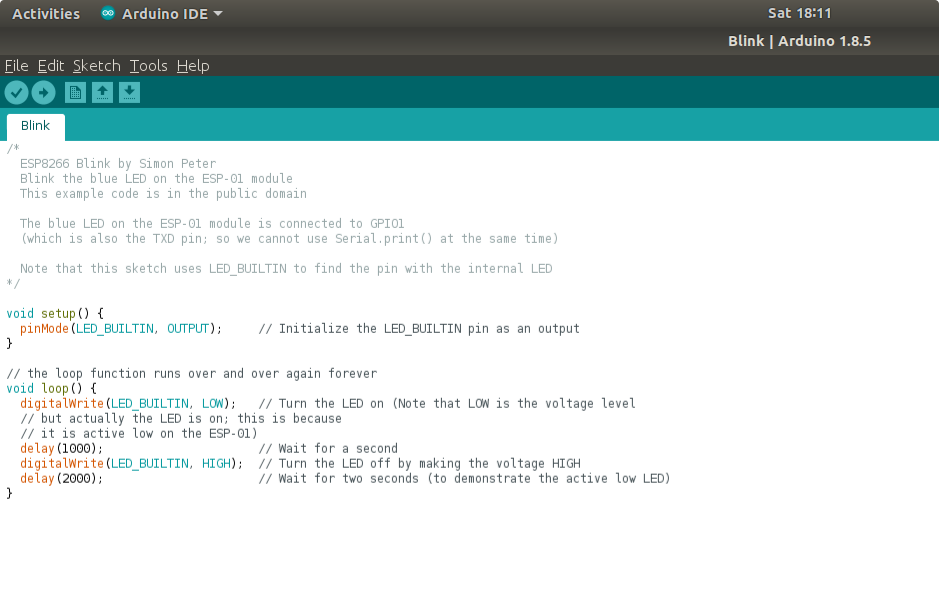
- Go to File >> Examples >> ESP8266 >> Blink.
It will look like below screen shot.
Upload program to NodeMCU
Now it's time to upload the blink program to NodeMCU hardware. Make sure NodeMCU is connected, correct Board and Port is elected. Then click on upload button. It will take few seconds to finish the uploading. If it get uploaded without any errors, then LED in the NodeMCU will start blinking.
Congratulations! You have completed your first NodeMCU programming. Now explore more exciting possibilities you can try this little amazing hardware.